Friday, September 15, 2017

Mixed Media Love

This journal layout started with a totally different idea in mind. After I created the background, and chose the flower, I felt that a quote about "Love" was what I was feeling. I began looking at different poems and was drawn to Rumi, but they all seemed too long to fit in this context, so I stumbled upon this one by Julie Wittey that was simple but captured a lot in few words.
It's been a few months since my last journal entry and I was beginning to get anxious about not doing them, so  many ideas in my head about what to create, and life was getting in the way of me and that process. Each day, I would try to create space to journal and it just was not happening. As my life journey would have it, I had to prepare the space and time. And finally it happened. I cleared all of my important high priority tasks out of the way, and could enjoy my Art Journaling adventure. And the journey began...I ended up someplace completely different that where I was headed, but completely wonderful! I love the layout, and leaned a few things that will help in future layouts. For example, I will not glue my pages together until I'm done to avoid the bubbles from the glued pages. Although they add texture and interest to the page, I want those details to be at my discretion and not just happy accidents. 
I wanted to use my infusions paints by Paper Artsy which I did on the back ground, but it was too busy once I put my flowers on top. So I decided to tone it back a little with some white pearl paint. I liked the way it made the colors fade and gave me a shimmer canvass to show off my flowers, yet, the subtleness of the walnut stain still adds dimension and interest to my background. I simply love it! Techniques used include stenciling, paper piecing of the flowers and a border in black and green. I am happy with the layout and like the simplicity of how all of the elements work together. I achieved dimension with the flowers by gluing them down in layers and using foam squares to add to the puffiness. My butterfly has metal antennae that is secured on the reverse page with some tape.

Products used include:
  • Mixed Media Art Journal from Michael's Art and Craft Store 
  • Faber-Castell Light Modeling Paste
  • Penny Black Slapstick Cling Stamp
  • IndigoBlu Script A6 Stamp (background)
  • Infusions Powder Paint by Paper Artsy
  • Paperartsy Fusions Coloured Stains: Lemoncello and Orange County
  • Glossy Accents by Ranger
  • Liquitex Regular Gel Matte Medium
  • Microline Permanent Markers
  • Faber-Castell Pitt Brush Markers
  • Tim Holtz Distress Inks: Vintage Photo, Firebrick Red and Pickled Raspberry
  • Ranger Archival Ink: Jet Black, Sepia,
  • Uni-Ball White Gel Pen
  • Office Depot Date Stamp
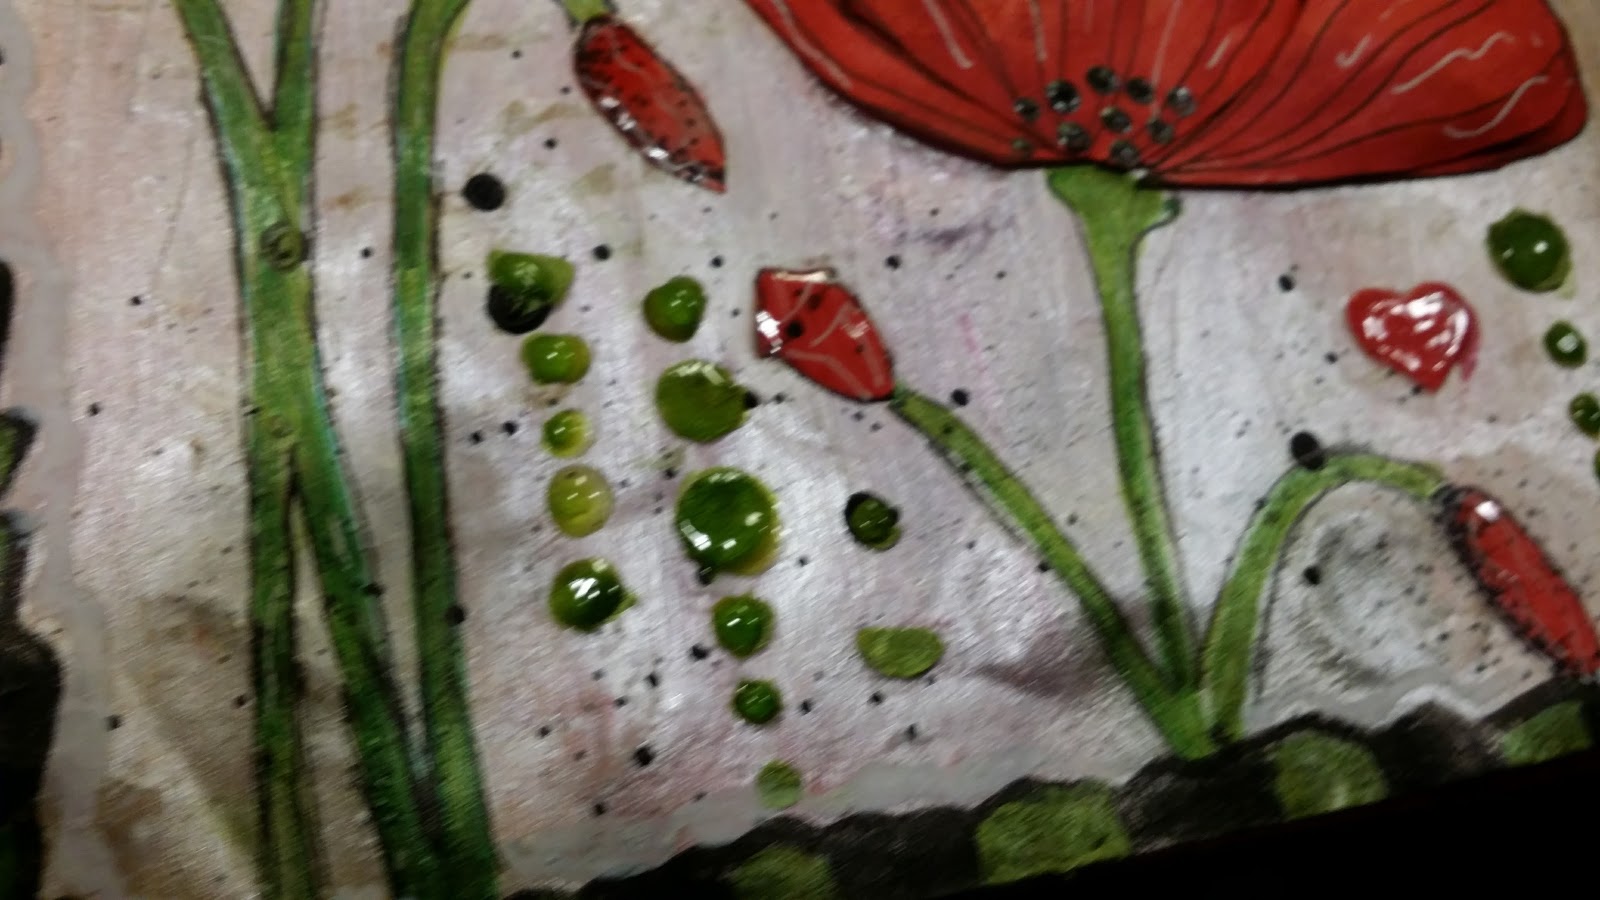
Here are some more close up pictures of the layout:


Saturday, July 29, 2017

A First Try....Stll Need Some Practice.


Since this blog is also my practice space, this is an attempt at drawing a woman's face. I admit the proportions are off, but I had fun doing it. Some things I got right, like contouring, shading, and some features. As a self critic, I have a lot to learn about drawing hair, making the face symmetrical, adding realism to the eyes and more. One thing that is important is the pressure on the pencil to obtain effective results for shading and desired results for facial hair like the eye lashes and eye brows. What I liked is the shape of her lips, the realism of her eyes (even though they are not the same) and the contour of her nose. I need to work on the space between her nose and her eyes, it should be less....but if I were going for a surrealistic look, it would be ok. She almost looks like she could be a man...lol! So anyway my friends... have fun! I did! And what I am most proud of, is that I tried by stepping out of my comfort zone. It was an exploration, a journey and I made it home safely...did not get lost, and no one was hurt. These kinds of journeys are the best kind. 

To quote Miles Davis:

Do not fear mistakes...there are none!

For a first attempt, I think I scored an A for courage. I always looked at others doing these types of drawings and though that it was way above my skill level...but then how would I ever get there unless I tried. So I give myself an "A" for effort. I shall continue to practice this type of drawing and work to improve my skills. What are you doing in life to improve a skill? Feel free to share below in the comments. Thanks for visiting. 

Materials used:

  • No 2 pencil
  • No 2b pencil
  • No HB pencil

Sunday, July 23, 2017

My Future...the Light

My Future
I just love this girl....She is a stamp by Prima Marketing of the Bloom Collection by Jamie Dougherty. Her name is Summer. I tried making a page with her early on in my Art Journaling journey, and I made all kinds of mistakes (which I later learned to turn into happy accidents)...But this time...Ah, I love her!

I experimented with some new materials in making this page. It includes a mixed dry pigment ink with walnut stain that activates with water to give that striated variable background. Instead of activating it with water, I mixed it with Gel Matte Medium to apply to the page to give me a non-porous surface to work with for shading and other layers that I knew I wanted to create.

I stamped Summer on the page with Archival ink and sealed it so I could do the coloring without worrying about anything bleeding and spreading. I added detail to accentuate her curly hair and brown skin tones and added blush to her cheeks and rose to her lips. The sun is made out of Washi tape, and the small lettering I did on my Brother label maker. I simply coated it with Gel Matte medium so I could add color and a distressed border to each of the words and applied that to my layout with more gel matte medium so it would not peel off later. I skip a page when creating so that if I need to punch a hole in the page as I did with the colorful brads on the flowers it does not ruin the art on the previous page. The flowers were die cut and colored with distress ink.

Overall, I love Summer with her Bindi jeweled eye wear and pink lips. This is a happy page. She exudes confidence, beauty, is prayerful, and says "My future starts in the morning when I wake up and sees the light" 

Materials used:
  • Prima Marketing: Jamie Dougherty - Bloom Collection - Summer
  • Paperartsy Fusions Coloured Stains: Lemoncello and Orange County
  • Washi Tape
  • Sheena Douglass Country Cottage Fanciful Fuchsia
  • American Crafts: Remarks: Patchwork Letter and Number Sticker Book 
  • Wink of Stella Clear glitter brush
  • Glossy Accents by Ranger
  • Golden Regular Gel Matte Medium
  • Liquitex Acrylic Gesso
  • Microline Permanent Markers
  • Faber-Castell Pitt Brush Markers
  • Tim Holtz Distress Inks: Vintage Photo, Mowed Lawn, Cracked Pistachio, Blueprint Sketch, Pickled Raspberry and Wilted Violet
  • Ranger Archival Ink: Jet Black
  • Uni-Ball White Gel Pen
  • Office Depot Date Stamp

Happiness

Happiness 

This was a remake of the very first Art Journal Page I made over a year ago and ripped out the page from my journal because I thought I had made a mistake and (which I did, I closed the book before it was dry and the pages stuck together and ruined my work, that was a trial by fire! I was so upset, disappointed in myself! I had worked so hard on that page.) But it was a good lesson, that all mistake can be happy accidents and you can recover no matter how bad you think it is.  Here's a picture of what I ripped out...


These layouts were inspired by Vicky Papaioannou, a very talented artist whom I have learned a lot from by watching her videos. She is so very good at what she does. I simply adore all of her work.

Now, back to this work, entitled Happiness! How was it made. My initial attempt (the one I ripped out above) were made with flowers I cut out from the Internet and colored them with markers. I was happy with this layout seeing that it was my first attempt, even though it was a copy of what I saw Vicky do on her channel. But in the completed work above, I actually drew freehand the flowers! I was so happy that I had the courage to try this! And I was happy with the outcome. So I decided to title the page Happiness. I did not have a title before I completed the background of the page.

I learned that there are stages in the process of creating that is like a journey. At some points along the way, you may think that it is not going to turn out good, or that you are not happy with your progress, but you just have to have courage to continue to the end resting assured that what you end up with will be good, if not better than your original vision of what you wanted to create. All things happen for the good. This is a metaphor for life and for art journaling. It will all be OK! All mistakes are recoverable, just keep going, you are the creator and have the power to repaint, cover, bend, adjust, correct. The process may take turns that are unexpected from your original vision, but keep going, you just might surprise yourself and be very happy with the end result.

Materials used in this layout:

  • Golden Regular Gel Matte Medium
  • Liquitex Acrylic Gesso
  • Dylusions Paints: White Linen, Fresh Lime, Dirty Martini, Lemon Zest and Tangerine Dream
  • Microline Permanaent Markers
  • Faber-Castell Texture Gems Pearl White
  • Ranger White Embossing Powder
  • Faber-Castell Pitt Brush Markers
  • Tim Holtz idea-ology / Cling Foam Stamps Block Upper and Block Lower
  • Tim Holtz Distress Inks: Vintage Photo and Mowed Lawn
  • Tim Holtz Stampers Anonymous Ultimate Grunge
  • Ranger Archival Ink: Jet Black
  • Uni-Ball White Gel Pen
  • Office Depot Date Stamp
Please post comments and tell me what you think of this latest page in my journal. I am still working on creating videos of my process to share on Youtube..stay tuned.

Create, Peace, Love and Soul!

Wednesday, July 12, 2017

Love Yourself First


I had so much fun creating this page...it's a perfect example of starting a project and at various stages you decide that its not worth saving...but you keep at it until you make it work. And I am so glad I did! I love the page. The background took on many iterations before ending up like this and I am happy with the results. It was a lesson on staying the course, because so many times I wanted  to chuck it and discard the development along the way...but I hung in there and began to see in my minds eye what I wanted to see there. I knew I wanted the young girl to be fashionable, and I wanted to give her a message to to love herself, so then the flowers began to bloom in my minds eye, and the quote was perfect.

Materials used:
  • Julie Nutting Cling Stamp: "Taylor"
  • Dylusions Paint: White linen
  • Tim Holtz Distressed ink: Carved Pumpkin
  • Martha Stewart Punch: Hearts
  • Liquidtex Light Modeling Paste Gel Medium
  • Liquidtex Matte Gel Medium
  • Ranger Glossy Accents
  • Uni-ball Signo Broad Gel Pen White
  • Pigma Micron 03 Archival Ink Pen
  • Wink of Stella Glitter Pen
  • Faber-Castel Pitt Pen Big Brush: Deep Scarlet Red #219
  • Faber-Castel Pitt Artist en Big Brush: Black #199
  • ColourArte Silks Acrylic Glaze Lemondrop
  • Things from my stash: flower stamps, stencils, lettering, and scrap-booking papers, silver micro beads.

Here are some close ups of the two page spread.


Wednesday, May 31, 2017

Home


This is a four page spread! My first! I call it Home. The sentiment: A house is made of bricks and beams. A home is made of hopes and dreams. I found this quote on the internet, so it is not original to me. I don't know who the author is, so if you are the author, kudos to you, leave me a comment below and I will be more than happy to post your name for credit.

This spread was inspired by Rach0113, her journal page: Home is Where the Heart Is. She has embedding disabled, so you can search for her channel and watch her techiques. I have not started making how to videos yet, so I just have stills here on my blog. They are coming, so please visit often to grow with me in this blog as I expand on my Art Journaling Journey.

On this page, I created four pages: Day and Night. On the left, is the sun with the day, each page has inspirational messages with the bike on the insert.  The inside houses flip to reveal the second half of the quote.  Here's a picture with the center page turned:


A short video of the center page being turned:


I used the following products:

Ranger Tim Holtz Distressed Ink: Twisted Citron
Ranger Tim Holtz Distressed Ink: Mowed Lawn
Ranger Tim Holtz Distressed Ink: Seedless Preserves
Ranger Tim Holtz Distressed Ink: Black Soot
Ranger Tim Hotlz Oxide Ink: Fired Brick
Ranger Tim Hotlz Oxide Ink: Fossilized Amber
Ranger Tim Hotlz Oxide Ink: Faded Jeans
Ranger Tim Hotlz Oxide Ink: Cracked Pistachio
Cricut Expressions
Adobe Creative Suite Illustrator (to draw the houses that I imported and cut with the Cricut)
Pentel White Gel Pen
Micron Fine Point Permanent Pen
Farber Castel Pitt Markers
Golden Matte Medium
Tim Holtz Idea-ology Metal Word Bands
Ranger Dyan Reaveley Dylusions Collection Ink Spray, After Midnight
Ranger Dyan Reaveley Dylusions Collection Ink Spray, Calypso Teal
Ranger Dyan Reaveley Dylusions Collection Ink Spray, Tangerine Dream
Ranger Dyan Reaveley Dylusions Collection Ink Spray, Cherry Pie


Tuesday, May 30, 2017

Happy Birthday Daddy!


This past weekend I had the pleasure of working with my niece Kennedy in making this card. She picked the elements and colored them. I simply assisted her and taught her how to use some of my equipment including the Cricut Expressions to cut the die cut lettering, the Cuttlebug to make the die cut bird, Tim Holtz Scissors to fussy cutting the cupcakes. We found the red wagon on the Internet and printed it out and fussy cut it for the layout. I think the Birthday Card for her Daddy came out beautifully, and I know she is very proud of her creative talent to put a smile on his face when she finally delivers this very special card. 

It's wonderful to work with children who like to express themselves in the creative art room or studio. She enjoyed using lots of tools, colored pens, markers, coloring books and more. We even had a math lesson (shh!...she told me she does not like math) when she had to calculate the designed panel, the card size, and the elements to be sure everything will fit. So it was math with a ruler, fractions, and decimals...I'd like to think her math lesson was fun!

So let me publicly say, Kennedy, I enjoyed playing with you in my studio and you are welcomed anytime. 

Supplies and products used:

Tim Holtz - Crazy Birds (Stamps and Dies)
Tim Holtz - Blueprint Assortment (Stamps)
Cricut Expressions Die Cutter
Cuttlebug Die Cut and Embossing Machine
Ranger Tim Holtz Distressed Ink: Fossilized Amber
Ranger Tim Holtz Distressed Ink: Faded Jeans
Ranger Tim Holtz Distressed Ink: Wilted Violet
Ranger Tim Holtz Distressed Ink: Black Soot
Darice Stripe Embossing Folder 5 x 7
Strathmore Watercolor Paper Series 200
Recollections™ Foam Adhesive Squares 
Neenah Exact Index White 90 pound 

Friday, May 26, 2017

Sacred Places

Sacred Places
 This layout was made with my Lavinia Stamps. They are whimsical and otherworldly vibe kind of stamps. As you can see I also used a shimmery acrylic paint by Colour Arte Silks. This layout was inspired by Rach0113 on Youtube. The sentiment is my original but the idea for the layout was inspired by her entitled Secret Garden. I love crediting the source of my inspiration, as they deserve the acknowledgement and it is my way of saying thank you for teaching me something new. Inevitably, I will vary something to make the layout my own, but I am forever grateful to these talented artist for sharing their creativity with the world via Youtube.

I used my "go to" techniques of paper piecing, stamping, and coloring. I added texture to my background by using blues, greens, and purple. I added a white ghosting border to the houses and mushroom figures so that they would stand out. I used dimensional sticker flowers to the garden. The stone pathway is a stamp by Lavina Stamps. My next goal for this blog is to add a Youtube video to actually show you how I did these, it was so much fun!


Saturday, May 20, 2017

Follow You Passion


This  mixed media layout was an experiment with tissue paper, transparent acrylic glaze by Silks by Colour Arte, texture paste by Farber-Castell, Golden Matte Regular Gel, Farber-Castell Pitt Pens, Zig Wink of Stella glitter pens, Gelly Roll White pen for highlights, stencils from my stash, and images of African American Ballerinas Ashley Murphy, Misty Copeland and two other ballerinas I found on the internet. I wanted to convey images of black women who were following their passions.

The tag, holds another quote from a stamp that I do not have but was inspired to use the text: 

The three ballerinas (left to right) are Ashley Murphy, with the Washington Ballet Theater, Misty Daniella Copeland, Principal with American Ballet Theater, and Michaela DePrince.

Spirit led me to select these women for my Art Journal Page, and now that I've learned about each of them, I am glad I did.They are excellent subjects for my layout about Following Your Passion. Surely each of these women follow their passion everyday as practice and performance is an integral part of their lives.


Michaela DePrince

Michaela is a Sierra Leonean orphan from the war in her native country who was adopted by American parents. A war survivor with vitaligo, she has had to overcome a lot of stigmatization, culture, loss of parents and sheer survival. You can read more about her story on her website. Since my daughter is also a Sierra Leonean, Michaela's story touched me as I learned about how her passion helped her to survive great odds, unbelievable adversity, and became a light to success as a ballerina, published author at the young age of twenty two. All of this juxtaposition to my daughter who has never been to Sierra Leone, I realize how incredibly blessed she is to be an American. However, when I look at the sheer talent and determination of Michaela I realize that it's not where you come from, but what you make out of yourself. I admire this young lady and was drawn to her image and so I included it on my art journal.


Misty Daniella Copeland

I love the fact that Misty Copeland is the first African American Principal of the American Ballet Theater. She's a trailblazer, a role model, an inspiration to me, young girls and women everywhere. She is a published author, and has a Barbie Doll in her name by Mattel, which I plan to get my hands on one. Misty is following her passion, as I read that she is in the studio dancing 8 hours a day 6 days a week. Truly a labor of love. She talks candidly about her aches and pains, as a dancer, but she has become strong by willing herself through it, and recognizes this as a strength. I so admire her for this, you can learn more about Misty on her website.


Ashley Murphy

Formerly a dancer with the Dance Theater of Harlem, Ashley is now with the Washington Ballet Theater. Originally from Shreveport, LA, Ashley's pose was so striking, I had to include her in my layout. You can learn more about Ashley on the Washington Ballet Theater website.


Let's Play


This is a card I made to invite my niece to come play with me in my art studio. She has a proclivity for the creative arts and I wanted to share some techniques with her to give her a head start in Art Journaling or card making. I made this card using the LDRS (Little Darling Rubber Stamp) Creative set called Happy Birthday Critters. It comes with stamps and dies. On the first image, I stamped directly on the card. The second one, I stamped and then die cut it so I could have some dimension with the balloons. The third Panda Bear, I stamped and glued it down. I think I like the one stamped directly on the card the best...he is integrated into the scene. I think I would like to fussy cut them instead of using the die for this project in the future, because it looks so funny like they are just pasted there instead of being part of the scene like the fox on the Pogo stick. But I was just having fun, and it is all a learning process....we'll see in the next iteration. I just love these little critters.  I printed out the sentiment on my Brother Label maker and made a fish tail tag for it and used the same yellow orange polka dot patterned paper I used for the frame.

The die set comes with four critters, plus the balloons, hats and cake and sentiments. Since this was not a birthday card, I did not use them and created my own and just used three critters  for this project. I experimented with my Spectrum Noir glitter marker pens,  Wink of Stella glitter pens, and my Faber-Castell Pitt markers to make the grass on the bottom. Since it was alcohol based markers, I did not do my normal shading and pasting with gel matte medium. I will make this card again using my normal materials that will allow me to do more blending.

Thursday, May 11, 2017

Coming Home


This Art Journal entry was an experiment using Lavinia Art work from the UK. I love her fantasy images, and purchased these two digital images to create this layout. I also purchased the stamps and will try this again once my stamps arrive. However, I could not wait, so I purchased a digital copy of the image and paper pieced it on my layout. It is an experiment with paper piecing, collage, and textured backgrounds. What I've learned from doing this layout is that my focal points need to stand out more. In this layout, I could have done that by making the background more monochromatic so that the house and the fairy could pop off of the page. The inspiration for this page was from Rach0113 Houses of Hope. Check her out, she really is talented and makes the most beautiful Art Journal pages, she's been an inspiration to me.

That is why this is a process, a learning process. I still wanted to post it and share with my blog community.

Materials used include Glossy Accents by Ranger to get the texture on the stepping stones. I used my Cricut machine to cut out the house, the fairy and the trees. The moon, Piggy lady, butterfly and birds were stickers from my stash. I also used Faber-Castell Big Brush Artist pens and Matt Gel to seal everything on the page. I still got some bleeding on my shadows on the hills...have to work on that...but all in all, it's an enchanted piece and I like it. What do you think?

Enjoy!

Sunday, April 23, 2017

Happy Birthday Card

Inspiration

Tim Holtz Crazy Birds stamp and die. It's spring time, and my daughter's birthday is always a special ocassion! So I created this card for her in spring colors with a flower, her initial and one of those crazy bird ladies. I paper pieced few embellishments and made a grungy happy birthday sentiment. All very feminine touches for a young woman starting a new career at 28. We all went to dinner to celebrate and she loved this card made with love from her Mom.

Techniques

I used Tim Holtz Watercolor cardstock and Distressed inks that I diluted with water and applied with a watercolor brush to get the beautiful watercolor effect on the background. I had the center flower die in my stash and used the same colors on that before die cutting the center element. The green flower was embellished with a beautiful blue flower with pearls. I made this card in less than 30 minutes before taking the celebrant out to dinner! We had a marvelous time and she loved the card and the heartfelt sentiment that I wrote to her on the inside. A keepsake for years to come.

Shadow of His Wings


Inspiration

This layout is inspired by Psalm 91:4. I think the Psalms are so beautiful, there are many that inspire me and I am sure I'll make more layouts with them in the future. I found this image (to the left) in a Google search for "angel wings". In my mind's eye, I envisioned this big Angel's wing hovering over a person who needed protection. Thank you to the artist (unknown) who created this beautiful work.

Technique

In my layout I first used Ranger Postale tissue paper to get some texture on the page. I then used a was of Liquitex Gesso to push it to the background. When that dried, I used a combination of metalic acrylic paint in blue, green, white, and gold.

For the wing, I sculpted Liquitex Light Modeling Paste to get a three dimensional image of the wing and added white acrylic paint and glitter to make it glisten and sparkle. I used Tim Holtz Distressed Pint in Tea Dye to get the highlight on the wings and in the background.

My background is made with white, green, blue and Tea Dye. I cut the title with my Cricut machine and printed the verse with my printer and cut the strips after burnishing the edges with Ranger Distressed ink in the Twigs color. The white highlights were done with white acrylic paint.

Creating this layout was a meditative experience. When doing inspirational layouts, it is like being in the presence of Angels while making each little decision that makes up your design. It feels like co-creating with the Divine. It is wonderful and makes me happy.

With reflection on the practical and mundane level, I make note of the things I've learned and can improve upon for my next project.

It Was Then That I Carried You


Inspiration

I created a series called Faith Journaling. It is inspired by a poem written by Mary Stevenson (1922 - 1999). I've loved this poem since I was a child, it is so simple and speaks to my heart. For those who have a relationship with Jesus Christ, it is an expression of His love for us that he is there to carry us through difficult times. I think the poem is beautiful

Techniques

In this layout, I used several techniques. I wanted to include the poem, but I did not want to put so much text on my layout, so I devised a way to add it by attaching a fold-able flap. On the back of the flap is a personal note to my daughter, reminding her that difficult times don't last forever. One of the things I picked up from watching some of my favorite YouTube vloggers is to date my layouts. As you can see the date stamp slipped in my hand on the message, but the date on the actual layout is accurate. One of those accidents, that happen, but not to worry, it does not detract from the design.

I found an illustration on Graphicstock.com for the feet. The original image had the toes separate, but when I imported the image into Cricut Design Space, I edited the image to join the feet to make one cutable image. I could not see myself cutting and pasting ten toes for all of those steps! I wanted subtly, so I made the footsteps in craft paper and simply added shading to distinguish them from the tone on tone background that represents the sand. I also used some Ranger Glossy Accents to put down some real miniature sea shells I had in my stash. The flood of white represents the crashing waves from the water, and I used some Farber-Castel Light Modeling Paste to get the texture I was looking for, and topped that with some Recollections Extra Fine Glitter to give my crashing waves some sparkle. Using my Cricut machine again, I cut my title in black paper and laid it down with some Ranger Gel Matt Medium. The clouds are hand drawn and fussy cut out of white card stock. I did use my Wink of Stella Pen to add some sparkle. And as I love the technique of adding shadows with my Farber-Castel Big Brush Pens and highlights with my UniBall White Gel Pen, to give everything a finishing touch. As I am still learning, each one of my layouts brings joy and happiness, and education. I learn something new with each one.

A Lesson Learned

A funny story, when I first started art journaling, I tried to make a layout from one of my favorite artists on YouTube. Things were going well, until I thought my layout was dry and it was not. I closed the book, and the pages stuck together. I opened it the next day and it was sticky some of the elements lifted from the page, and I was so embarrassed to myself. I cut the page out of the book and started over. It was a good lesson. First, make sure it is dry before closing, if using a heat tool, then still leave it open over night. Second, I ended up fixing that boo-boo, and the layout was fine. However, I had already torn it out of the book, so it did not get a chance to live with its "friends" (other pages created by me). Bottom line, accidents and boo-boos are learning opportunities and should not be discarded, but kept as reminders of the lesson. So my friends, jump in, have fun, and create something you love.


First Miracle


According to the New Testament in the Bible, Jesus' first miracle was turning water into wine. This story always struck me as to how special Jesus must have been to change barrels and barrels of water into wine. I found these images online and paper pieced them into my layout. I drew the wine vats freehand and colored them with Tim Holtz Distressed Inks. I really enjoyed creating the shadows and shading with my Farber-Castell Big Brush Pens. Highlights were done with a UniBall white gel pen. This layout has Tim Holtz' Postale tissue paper in the background for texture. With the way the light is shinning, when I took the picture, it gives the sense that it is a stain glass window. I especially like juxtaposing this miracle with the quote by Jesus telling his disciples that "greater things than these shall you do".

Your Calling


Here again I am using Tim Holtz Crazy Birds. I fussy cut the flowers as I did not have any die cut flowers to use. The inspiration for this page was a technique I watched Vicky Papaioannou do in one of her videos where she used 4 pages and glued them together. The black and white border is actually created on a separate page and the two inside pages are trimmed on the inside. Love it! I like the way the flowers are off of the page like the birds tail.

"The quote: The things you are passionate about are not random they are your calling." There are a lot of techniques going on here, splatters, stamps, Crazy Birds by Tim Holtz, White embossing powder, and white gel pen. I drew the branch the bird is sitting on using my Farber-Castell Big Brush Pens. I don't have them all, but a few collections were enough for me to get the shading that I wanted. Overall, I am happy with the way this layout turned out, a little grunge mixed with the feminine ...it puts a smile on my face.

Stand Out from the Crowd


I just loved using these owls. I subscribed to graphicstock.com and printed them on my printer. I sealed them with Gel Matt Medium so they would not bleed when pasting them down. I fussy cut them and drew the branch freehand on across the page. This is in the 6 x 7.5 Chipboard journal that I've been loving lately to do my journal pages. The houses were also found in the same collection on graphicstock. I explored adding texture paste on this layout. I just happened to have some blue in the tube by Delta (texture magic) and I painted it green to match my background. I had fun creating this layout. It feels like I'm in the jungle someplace with all of these cute owls. I got the inspiration from

Spring Bee Happy


This page was done in a 6 x 7.5 Journal I purchased at Michaels Craft store. It has white pages and brown craft pages in the center. I have not used those yet. The process I used here was to use Gel Matt Medium to lay down some texture with Tim Holtz Postale Tissue Paper in the background. I then used Gesso to push that background further back and paper pieced the flowers, sun, and bumble bee. I think the bee is so cute. The sun and flower die cut is from one of Tim Holtz' Scribbles and Splat collection. I created the titles on my Cricut machine. It was fun exploring this technique and I will use it again with more compositions.

Project Title: Successful Women

Here is one of my first projects. After watching Vicky Papaioannou on Youtube for hours, I finally took the plunge. The Crazy Birds are stamps and die cuts from Tim Holtz. I fell in love with them when I watched Vicky do a journal page with them. Since I got them, I've made this page, used them in other pages, and cards. I think they are just hilarious. And one thing I like is to have fun images on my pages. While I did not copy this layout element for element, I did use the quote as the starting point for my inspiration.

What I did use from Vicky's design is the border. I thought that the black and white border on my mixed media backgrounds with the rich orange and yellow colors worked well. I had so much fun coloring those Crazy Birds! I used metalic water colors and Tim Holtz Distressed inks.  What I learned in this layout is the importance of working in layers, making sure each layer is sealed and dry to create a non porous surface to do shading and highlights. It was very satisfying to see all that I learned really worked!